Have you ever thought that when you were writing you actually were not writing, but instead you were drawing? I never have. That is until I heard a presentation by Rand Nelson, the Director of Training, Research, and Development at Peterson Directed Handwriting.
The Product:
Peterson Directed Handwriting is a totally different approach toward teaching handwriting skills. They base their approach out of movement and mastery of the form and positioning of letters as opposed to just copying letters printed on a page a million times.
There are just 4 basic strokes ("Sharp Top", "Loop Top", etc.) needed to create all 26 letters and you only need to learn 3 movements in order to make these basic strokes. These strokes are also color-coded which allows for a visual reference point while practicing the movements.
There are 4 basic steps of the teaching process:
Step 1. Illustrate and Describe - You as the teacher get to show how the form or letter is to be correctly written and then describe how to write it using a series of "commands." These commands or action words are said out loud as you (the teacher) trace the strokes with your finger. They have animated letter cards available to help with this step of the process. I printed these cards out and laminated them so that they would be easily accessible and not easily ruined.
Step 2. Air Writing - This is the step which connects your movements to your voice. As you make the movements with your finger in the air you say key phrases associated with the letter you are working on. For example let's use the capital letter "A." You would say "Curve Down ,Sharp Top, Finish." You would be moving while repeating the key phrases. Your voice is now helping your brain and your muscles to "remember" the movement when you hear the key phrases. Another fun thing about air writing is that you can use multiple body parts to "write" with. Mr. Nelson says to try writing in the air with your arm and your elbows on both your left and right side. (I think this is the most fun step.)
Step 3. Finger-Tracing - At this step you want to be sure to have your paper in "writing position" and being held so that the writing arm is under the image and not blocking the image. The finger-tracing takes place as the action phrases are chanted out loud. You can repeat this step a few more times increasing the speed at which you chant.
Step 4. Write and Say - In this final step you do not go to regular paper! You instead go to unlined paper or a chalkboard or a whiteboard. This is because we are working on teaching muscle memory and developing the gross motor patterns so that we write and not just "Draw" our letters. The goal in this step is to move your writing utensil (pencil, chalk, or dry erase marker) with your voice so that your muscle memory is moving the writing utensil! PDH says to write 4 and pick the best one., As the teacher you direct the step by chanting with your child.
My Experience:
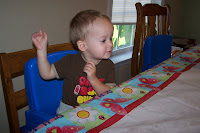
Although at first I had a time getting into the use of this product, we did get the hang of it. So I wanted to share some pictures. Here you will see the girls (and even the baby) working on our Air Writing (Step 2).
Then we went on to practice with Finger Tracing (Step 3). The first picture is being done with her eyes shut and chanting the action words to help her muscle "remember" the movements.
Then we went on to writing on the unlined paper while chanting our key phrase (Step 4).
As well as writing on lined paper.
Our Thoughts:
I will say that this is a totally different approach to teaching and learning how to write. I had a very difficult time in the beginning trying to figure out how to start with this program. It seemed like I spent a lot of time reading through the gobs of free information on the Peterson site,and the more I read the less sure of myself I felt in teaching it. And then it clicked! I was making it way harder then necessary. I went and listened to a 20 minute online presentation and the process made more sense. I encourage you to check out the site and research the site. there is a wealth of information about the product and about the science behind the process that would make it worth your while.
You can even review the product before viewing. Go to this link and almost at the bottom you can click and review it yourself! Are you teaching a left-hander or are you, the teacher, a left-hander? Then go here and learn more about how this program addresses left-handedness.
I was reviewing The Cursive E-Book Series since my eldest started learning cursive last year. The prices vary depending on what you are wanting to purchase including discounts on bundles, but for Cursive 2 E-Book it is only $29.95. You might want to contact Mr. Nelson directly to discuss your family's needs.
You can also see what other crew mates have said about this product by going over to the Homeschool Crew Blog Site. Let me know what you think after you've taken some time to look over all that Peterson Directed Handwriting has to offer.
*** I am a member of The Old Schoolhouse 2010-2011 Crew and receive free products and services in exchange for a thorough and honest review. Though I am compensated with free products, I am not compensated in the form of money for any of my reviews. My reviews will always reflect my honest opinions, findings, beliefs and experiences with the products and services that I receive.***


2 comments:
Excellent review. Love the pics!!!
Great review and the pictures are great! http://ourhomeschoolreviews.blogspot.com/
Post a Comment